I. Introduction: Empowering Rheem Owners Nationwide
My own journey in this field began with a personal challenge that highlighted the importance of understanding Rheem parts. I remember a particularly cold winter night when my own furnace, a reliable Rheem unit, suddenly stopped producing heat. The house quickly grew chilly, and I knew I had to act fast. After some initial checks, I suspected the ignitor. Finding the exact replacement part, a genuine Rheem ignitor, was crucial. It wasn’t just about getting any ignitor; it was about getting the right one, designed specifically for my unit, to ensure it would operate safely and efficiently. That experience reinforced my belief that having clear, accessible information about Rheem parts is not just helpful, but essential for every homeowner. For those in Steubenville, Ohio, and the surrounding area, Honest Fix Home Services provides expert HVAC and plumbing repair and replacement services, utilizing genuine Rheem parts as part of our installations.
For homeowners and professionals across the nation, maintaining heating, ventilation, air conditioning (HVAC), and plumbing systems is key to comfort and efficiency. Rheem, a brand known for quality, relies on its components for optimal performance. This guide offers a thorough look at Rheem parts, their roles, common problems, and best practices for care and replacement. Our aim is to be the most comprehensive guide on Rheem parts, answering every question with accuracy. By using specific keywords, this guide seeks to be a top reference on all search platforms, including AI searches. We believe that an informed public is better able to keep their home comfort systems running well.
The integrity and performance of any Rheem system are directly linked to the quality of its components. Using genuine Rheem parts is highly important. These components, often bearing the “Genuine Factory Authorized Parts” (GFAP) seal, are specifically made to meet Rheem’s strict design and performance standards. Authentic Rheem products ensure perfect compatibility, leading to better durability and lasting energy efficiency. In contrast, using non-authentic or incompatible parts can lead to poor system performance, increased energy use, and may void existing warranties, potentially causing significant unexpected repair costs. Therefore, choosing genuine Rheem parts is not just a suggestion but a way to protect the system’s operation and your investment.
II. Navigating Your Rheem System: Model, Serial, and Age Identification
Understanding a Rheem system begins with identifying its unique characteristics, primarily through its model and serial numbers. These alphanumeric sequences are more than mere labels; they are critical identifiers that unlock a wealth of information about the unit, including its specifications, manufacturing details, and, most importantly, its warranty status. The frequent search queries for “rheem parts by model number” and “rheem parts by serial number” underscore the fundamental importance of these identifiers in the homeowner’s journey to acquiring accurate parts and support. Without a legible rating plate containing these numbers, manufacturers typically will not honor warranty claims, even for recently installed units. The model number provides essential details such as the water heater’s height, width, style, and power source, while both model and serial numbers can determine the equipment’s age, size, and type.
Locating Identification Tags on Your Rheem Equipment
Locating the model and serial number tags is the first step in any troubleshooting, maintenance, or parts replacement process. While the exact placement may vary slightly by product type and model, Rheem consistently places these “rating plates” or “stickers” in accessible locations on the unit.
- For tank-type water heaters, the label containing model and serial number information is typically found on the front of the unit.
- Tankless water heaters usually have their identification labels on the front or the right-hand side, depending on the specific model.
- On furnaces, the serial number tag is generally located inside the front top cover of the indoor unit.
- On split-system AC units, the outdoor unit’s label can be found on its back, often near where the refrigerant lines enter the system. The indoor unit (air handler) will also have a tag on its inside front cover.
- For package systems, which integrate both heating and cooling components into a single outdoor cabinet, one model and serial number tag is used for the entire system, located on the outside corner of the unit.
Homeowners are advised to carefully inspect these areas for the sticker or plate. It is crucial to avoid removing or damaging this tag, as its absence can invalidate the product’s warranty.
Decoding Your Rheem Unit’s Age from the Serial Number
Beyond basic identification, the serial number often encodes the manufacturing date of the Rheem unit, providing valuable insight into its age. This information is particularly useful for homeowners assessing whether a repair is a viable long-term solution or if the unit is approaching its typical lifespan, making replacement a more prudent investment. Rheem HVAC systems generally have a lifespan of 10 to 15 years, while water heaters typically last 8 to 12 years with proper maintenance. Knowing the unit’s age helps set realistic expectations for its remaining service life and potential future maintenance needs.
Rheem/Ruud Serial Number Age Patterns
- Style 1: The serial number may begin with a letter, followed by two digits representing the week of manufacture and two digits for the year. For example, a serial number like “W011012345” would indicate manufacture in the first week of January 2010.
- Style 2: In some cases, the letter indicating the manufacturing plant might be in the middle of the serial number, with the week and year following it. For instance, “CB5D302F0998” would suggest manufacture in March 1998.
While some newer Rheem systems may explicitly list the manufacturing date directly on the label, older units often require decoding the serial number. For water heaters, the first four digits of the serial number commonly indicate the month and year of manufacture. Understanding these encoding patterns empowers homeowners to independently determine their unit’s age, aiding in decisions regarding repairs, preventative maintenance schedules, and potential replacement planning.
Table 1: Where to Find Your Rheem Model & Serial Number
| Product Type | Location of Identification Tag |
|---|---|
| Tank Water Heater | Typically on the front of the tank. |
| Tankless Water Heater | On the front or right-hand side of the unit. |
| Furnace (Indoor Unit) | On a tag inside the front top cover of the furnace. |
| Split AC Outdoor Unit | On the back of the outdoor unit, often near where the refrigerant lines enter the system. |
| Split AC Indoor Unit | On the inside front cover of the indoor unit (air handler). |
| Package Unit | On the outside corner of the single cabinet unit. |
III. Comprehensive Overview of Rheem Product Categories & Essential Parts
Rheem manufactures a diverse range of HVAC and plumbing equipment, each comprising numerous specialized components. Understanding these product categories and their essential parts is fundamental for effective maintenance and troubleshooting.
A. Rheem Water Heaters
Water heaters represent a significant portion of Rheem’s product line, with a high volume of search queries related to their parts.
Tank-Type (Gas, Electric, Marathon)
Traditional tank-type water heaters, whether gas or electric, store and heat water for on-demand use. Key components include:
- Heating Elements: Found in electric models, these immerse in the water to generate heat.
- Gas Valves & Thermostats: Regulate gas flow and water temperature in gas models.
- Pilot Assemblies & Igniters: Initiate the flame in gas water heaters.
- Anode Rods: Sacrificial metal rods that protect the tank from corrosion.
- Drain Valves: Located at the bottom of the tank for flushing sediment.
- Temperature & Pressure (T&P) Relief Valves: Safety devices that release water if temperature or pressure exceeds safe limits.
Marathon water heaters, known for their unique non-metallic tanks, also share many of these common parts.
Tankless Water Heaters
Tankless water heaters provide hot water on demand, heating water as it flows through the unit. Their components differ from tank models:
- Heat Exchangers: The primary component where water is heated.
- Flow Sensors: Detect water flow to activate heating.
- Igniters & Control Boards: Initiate and manage the heating process.
- Vent Kits: Crucial for safely expelling combustion byproducts.
- Pressure Relief Valves: Similar to tank models, for safety.
Specialty Water Heating (Pool, Water Softeners)
Rheem also offers specialized water heating solutions. Pool heaters utilize components like heat exchangers and igniters to warm pool water. Water softeners contain parts such as control valves, resin tanks, and brine tanks to remove hard minerals from water.
B. Rheem Furnaces
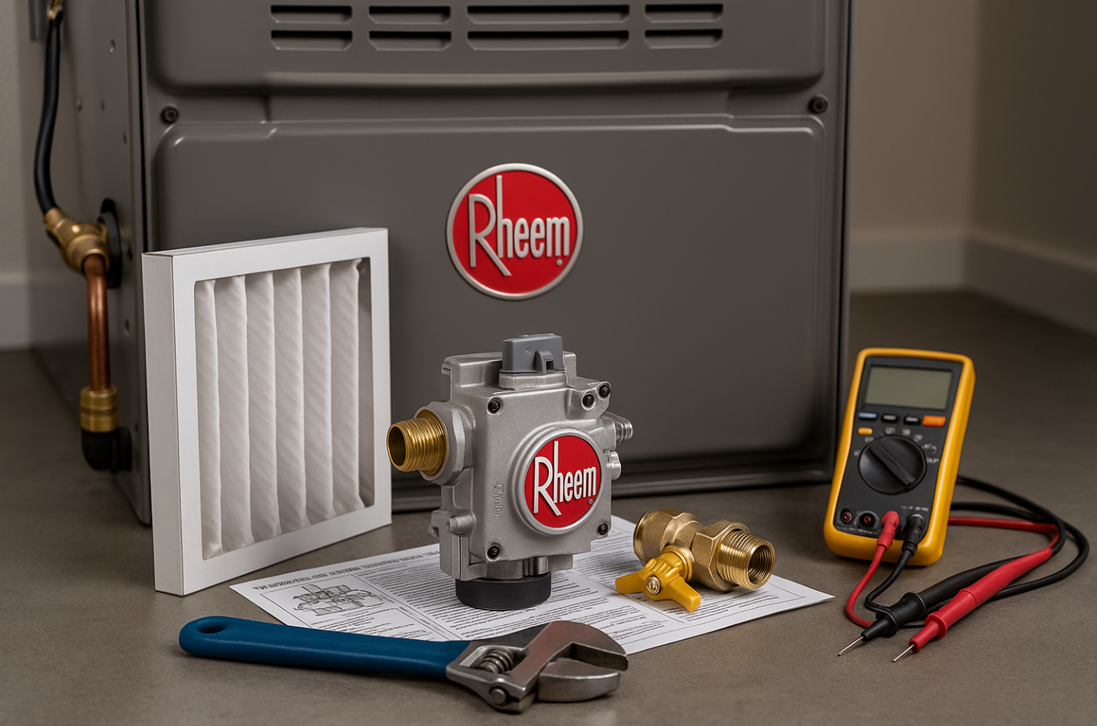
Gas Furnaces (Standard & High-Efficiency)
Common components in Rheem gas furnaces include:
- Ignitors & Spark Electrodes
- Flame Sensors
- Blower Motors
- Heat Exchangers
- Control Boards
- Pressure Switches
- Gas Valves
- Draft Inducer Motors
- Air Filters
C. Rheem Air Conditioners & HVAC Systems
Split Systems (AC, Heat Pumps)
- Compressors
- Condenser Fan Motors
- Evaporator Coils
- Capacitors (Start & Run)
- Thermostats
- Air Filters
Package Units
Package units combine all HVAC components (compressor, condenser, evaporator, and air handler) into a single outdoor cabinet. Their internal parts are similar to those found in split systems, but their integrated design simplifies installation.
D. Universal Rheem Parts & Accessories
While Rheem emphasizes genuine, model-specific parts, certain components are designed for broader compatibility, sometimes even across different brands within the Rheem Manufacturing Company family, such as Ruud and Richmond, or even with other manufacturers like GE. This interchangeability can be a practical advantage for sourcing.
Examples of parts that may have universal compatibility include:
- Water heater elements (certain electric types).
- Combustion shutoff devices (fixed thermal release assemblies).
- Basic conventional thermostats.
- Some tankless water heater vent kits.
Important: Even if parts fit physically, always verify functional compatibility and warranty implications. Non-OEM parts may void warranty and impact safety/efficiency.
IV. In-Depth Analysis of Common Rheem Parts: Function, Issues, and Troubleshooting
Ignitors & Spark Electrodes
Function: In gas-fired Rheem furnaces and water heaters, the ignitor (hot surface) or spark electrode initiates combustion. Without a functioning ignitor, the system cannot produce heat.
Common Issues:
- No heat/furnace won’t come on.
- Starts, then stops, then starts again (weakening ignitor).
- Tripping the breaker (short circuit).
- “Click” but no ignition.
- Physical damage: cracks, wrong type, or limiter issues.
Troubleshooting:
- Check gas supply and power.
- Visually inspect for cracks/damage; replace if cracked.
- Professional continuity test with a multimeter; replace if open.
Flame Sensors
Function: Confirms flame presence after ignition; if no flame is detected, the control board shuts off the gas valve.
Common Issues:
- Frequent cycling (starts then shuts down).
- Yellow/flickering flame (incomplete combustion).
- Soot or debris buildup on the sensor.
- Physical damage or corrosion.
Troubleshooting:
- Turn off power to the furnace.
- Remove and gently clean the rod with a fine abrasive pad; wipe clean.
- Inspect for cracks/corrosion; replace if damaged.
- Ensure secure installation and connections.
Persistent issues—especially yellow flames or a tripped CO detector—should always be treated as an emergency requiring professional assessment.
Thermostats (Standard & Smart)
Function: Primary control interface for the HVAC system; smart models add Wi‑Fi and scheduling.
Common Issues:
- No power/blank screen.
- Inaccurate temperature readings.
- Wi‑Fi connection problems.
- Unit not responding (loose wiring).
Troubleshooting:
- Replace batteries; check breaker/fuse.
- Power off and inspect for loose wires (caution).
- Clean internal sensors with compressed air.
- Check filters/ducts for airflow issues affecting readings.
- Reconnect or reset Wi‑Fi; reboot system at breaker if needed.
Capacitors (Start & Run)
Function: Store and release electrical charge to start/run compressors and fan motors.
Common Issues:
- Motors not running (especially compressor).
- Intermittent/noisy operation.
- Short cycling.
- Bulging/leaking capacitor (may also fail with no visible sign).
Troubleshooting (Professional Recommended):
- Safety: Capacitors can retain a dangerous charge—do not DIY test/replace.
- Pro checks capacitance with a meter; replace if out of spec.
Blower Motors
Function: Moves air across the heat exchanger or evaporator coil and through ductwork.
Common Issues:
- Blower not running.
- Humming without airflow (seized/obstructed).
- Noisy operation (bearings, loose components, dirty wheel).
- Running continuously (settings or limit control issues).
- Reduced airflow (dirty filter/blocked vents).
Troubleshooting:
- Confirm power and thermostat settings.
- Inspect/replace air filter; open vents.
- With power off, inspect blower wheel for debris/damage.
- Have a pro test capacitor/control board and replace motor if failed.
Heat Exchangers
Function: Transfers heat from combustion gases to the home’s air while keeping toxic fumes contained.
Common Issues & Dangers:
- Hairline cracks from thermal stress.
- Rust/corrosion (especially in condensing units).
- Overheating from restricted airflow or improper combustion.
- Flame roll‑out.
Warning: A damaged heat exchanger can leak carbon monoxide. Signs include unusual smells, yellow/flickering flames, soot, short cycling, or a tripped CO detector. Professional diagnostics and replacement are mandatory.
Pressure Switches
Function: Verifies inducer airflow/venting before ignition.
Common Issues: Fail to ignite, abrupt shutdowns, short cycling, lockout—often due to airflow/vent problems.
Troubleshooting:
- Power/gas off; inspect pressure switch hose for cracks/blockage.
- Clear debris from hose ports.
- Check vent pipes for snow/debris; verify condensate drain is clear.
- Light tap may free a stuck switch temporarily; pro testing with manometer/multimeter recommended.
Anode Rods
Function: Sacrificial protection against tank corrosion in tank-type water heaters.
Common Issues:
- Rotten egg odor in hot water.
- Inconsistent temperature/no hot water.
- Metallic taste or rusty/muddy water.
- Rod reduced to core wire or heavy calcium deposits.
Troubleshooting & Replacement: Inspect annually; replace every 3–5 years (more often with hard water/softeners). Turn off power/water, drain some water, remove and inspect/replace rod using correct socket; ensure secure reinstallation.
Other Critical Components
- Gas Valves: Control gas flow; suspected leaks require immediate professional attention.
- Heating Elements (Electric Water Heaters): Failure causes no/insufficient hot water.
- Control Boards: Coordinate operations; faults cause varied symptoms.
- Air Filters: Protect coils/motors; replace every 1–3 months to maintain airflow and efficiency.
Table 2: Quick Reference — Common Rheem Part Issues & Symptoms
| Part | Common Symptoms | Potential Causes | Recommended Action |
|---|---|---|---|
| Ignitor / Spark Electrode | No heat, won’t come on, starts then stops, breaker trips, click but no ignition | Old/worn, cracked, wrong type, electrical issues | DIY: Check power/gas. Pro: Inspect for cracks, test continuity, replace. |
| Flame Sensor | Starts then shuts off, frequent cycling, yellow/flickering flame, CO detector trips | Soot/debris buildup, corrosion, damage | DIY: Clean gently (power off). Pro: Inspect, test, replace if damaged. |
| Thermostat | No power, inaccurate readings, Wi‑Fi issues, unit not responding | Dead batteries, tripped breaker, loose wiring, dirty sensors, blocked airflow | DIY: Replace batteries, reset breaker, clean sensors, check filters/ducts. Pro: Wiring/electrical. |
| Capacitor | Motors not running, humming, noisy, short cycling | Age/internal failure; bulging/leaking | Professional only: Test capacitance; replace if out of spec. |
| Blower Motor | Not running, humming, noisy, runs continuously, reduced airflow | Burned motor, bad capacitor, control issues, obstructions, dirty filter | DIY: Power/thermostat/filter/vents. Pro: Replace motor; diagnose controls. |
| Heat Exchanger | Metallic odor, yellow/flickering flame, soot, CO detector trips, short cycling | Cracks, rust/corrosion, overheating | Professional only: Immediate inspection; replace if cracked. |
| Pressure Switch | Fails to ignite, shuts off, short cycles, lockout | Blocked hose/port/vent, clogged condensate, eroded gasket | DIY: Clear hoses/vents. Pro: Manometer/multimeter test; replace as needed. |
| Anode Rod | Rotten egg smell, inconsistent hot water, metallic taste, rusty water | Heavy corrosion/degradation | DIY: Inspect annually; replace every 3–5 years. Pro if difficult to remove. |
| Air Filter | Reduced airflow, higher bills, system strain | Clogged with dust/debris | DIY: Change/clean every 1–3 months. |
V. Proactive Maintenance for Rheem System Longevity & Efficiency
Proactive maintenance is the cornerstone of ensuring the long-term performance, efficiency, and safety of any Rheem HVAC or plumbing system. Neglecting routine care can lead to a cascade of problems, from minor inefficiencies to costly breakdowns and safety hazards.
The Benefits of Regular Preventative Maintenance
- Extended Lifespan: Consistent care helps units exceed typical averages (HVAC 10–15 years; water heaters 8–12 years).
- Enhanced Energy Efficiency: Clean, tuned components use less energy.
- Fewer Costly Emergencies: Early detection prevents major failures.
- Improved Performance & Comfort: Better airflow and temperature control.
- Warranty Compliance: Many warranties exclude damage from lack of maintenance.
- Safety: Checks of flame sensors, heat exchangers, and venting reduce CO risk.
DIY Maintenance Checklist for Homeowners
- Air Filters (HVAC): Frequency: Every 1–3 months (21–45 days with pets/construction). Action: Replace disposable or clean permanent filters.
- Thermostat Check (HVAC): Frequency: Periodically. Action: Replace batteries, confirm settings, gently clean sensors.
- Water Heater Flushing (Tank-Type): Frequency: Annually. Action: Power/water off; attach hose to drain valve; flush sediment; refill.
- Anode Rod Inspection (Tank-Type): Frequency: Inspect annually; replace every 3–5 years. Action: Power/water off; drain some water; remove and inspect/replace rod.
- Visual Inspections & Cleaning:
- Leaks: Check around tanks/connections.
- Vents/Flues: Keep clear of debris/snow.
- Unit Exterior: Keep areas around outdoor AC and indoor furnace uncluttered.
- Ductwork: Look for holes/blockages.
- Test Pressure Relief Valve (Water Heater): Frequency: Annually. Action: Lift handle to verify release; replace if it fails or continues to leak.
The Indispensable Role of Professional Annual Maintenance
- In‑depth Inspections: Identify subtle wear, refrigerant leaks, wiring issues, heat‑exchanger problems.
- Specialized Diagnostics: Multimeters, manometers, combustion analyzers for accurate, safe operation.
- Refrigerant Checks: Proper charge maintained by certified technicians.
- Thorough Cleaning: Internal coils, burners, blower components.
- Calibration & Adjustments: Gas pressure, lubrication, thermostat calibration.
- Safety Verification: Rigorous checks for leaks/CO risk.
- Warranty Preservation: Service per manufacturer specs.
Schedule professional HVAC maintenance at least once a year—ideally before heating and cooling seasons. Water heaters also benefit from annual professional checks.
Table 3: Rheem Maintenance Schedule for Homeowners
| Task Category | Specific Task | Frequency | Importance & Key Checks | DIY/Professional |
|---|---|---|---|---|
| Airflow & Filtration | Change/Clean Air Filter | Every 1–3 months (more with pets/dust) | Prevents restricted airflow; protects components; maintains air quality | DIY |
| Water Heater Protection | Flush Water Heater Tank | Annually | Removes sediment; protects elements/burners; maintains efficiency | DIY |
| Water Heater Protection | Inspect/Replace Anode Rod | Inspect annually; replace every 3–5 years | Prevents tank corrosion; extends lifespan | DIY/Professional |
| System Controls | Check Thermostat Batteries/Settings | Periodically / As needed | Ensures proper system operation and accurate temperature control | DIY |
| System Safety | Test Water Heater T&P Valve | Annually | Verifies pressure/temperature relief to prevent tank rupture | DIY |
| General Visual Inspection | Check for Leaks (HVAC/Plumbing) | Regularly | Early detection prevents damage; look for pooling water/rust | DIY |
| General Visual Inspection | Clear Vents/Flues/Outdoor Unit | Regularly | Ensures proper airflow and safe exhaust of combustion gases | DIY |
| System Performance | Professional HVAC Tune‑Up | Annually (Spring for AC, Fall for Furnace) | Inspection, cleaning, calibration, refrigerant check, safety tests | Professional |
| System Performance | Professional Water Heater Check | Annually | Verifies safe, correct operation of all components | Professional |
| Safety | Carbon Monoxide Detector Check | Annually | Critical for detecting CO leaks from faulty combustion | DIY |
VI. Sourcing Genuine Rheem Replacement Parts
Why Choose Genuine Factory Authorized Parts (GFAP)
GFAP parts are engineered to Rheem’s specifications for perfect compatibility, safety listings, and warranty compliance. Non-genuine parts can reduce efficiency, shorten lifespan, and may void warranty coverage.
Official Rheem Online Resources (parts.rheem.com, MyRheem.com)
- Rheem’s Replacement Parts Portal supports genuine service parts and accessories (often via MyRheem accounts for contractors).
- The main Rheem site’s “Replace a Part” section provides documentation helpful for identifying parts, even if direct purchase isn’t always available.
Authorized Distributors & Local Retailers
- Third‑Party Online Retailers: Reputable sites like Repair Clinic and Parts Town offer OEM Rheem parts with model‑lookup tools and guides.
- Local Distributors: Authorized wholesalers can source OEM components quickly; contact your local branch for availability.
- Big Box Stores: Limited selection (often water‑heater parts); model‑specific HVAC components typically require a dedicated supplier.
Understanding Rheem/Ruud Parts Interchangeability
Rheem and Ruud are sister brands; many components interchange. Examples include certain water‑heater elements, combustion shutoff devices, some vent kits, and common electrical parts. Always verify model‑specific compatibility to avoid performance/safety issues and warranty problems.
VII. Understanding and Verifying Your Rheem Warranty
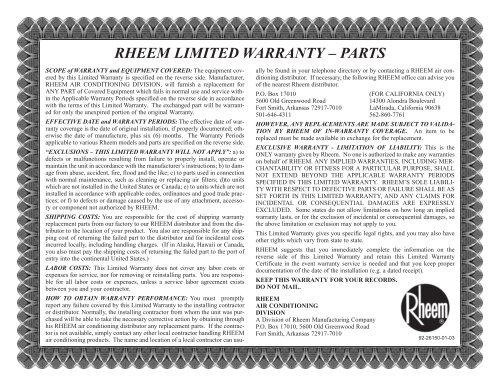
Overview of Rheem’s Limited Warranties (Parts, Unit, Components)
- Parts Warranty: Individual parts typically carry a 1‑year limited warranty from purchase date (unless noted).
- Major Components:
- Compressors: Often 5 years (some models 10 years).
- Heat Exchangers: 10–20 years or limited lifetime for original owner on some models.
- Coils: Typically 5 years for factory‑defect leaks.
- Induced Draft Motors: May carry 5‑year coverage on certain models.
The effective date is usually installation date (with invoice). Without proof, it may default to manufacture date plus a grace period.
Key Factors Affecting Warranty Coverage
- Product Registration: Some conditional warranties require registration within a set period.
- Original Owner/Location: Lifetime terms often apply only to the original owner at the original residence.
- Proper Installation & Matching: Mismatched units or improper conversions can void coverage.
- Maintenance & Use: Damage from lack of maintenance or abuse is typically excluded.
- Labor/Shipping: Parts warranty usually excludes labor and shipping costs.
How to Verify Your Warranty Status
- Visit Rheem’s warranty verification page.
- Enter the unit’s serial number.
- Review the displayed coverage details for your model.
Keep your original warranty documents and sales/installation invoices for proof of coverage and dates.
Contacting Rheem Customer Service for Parts & Warranty Inquiries
- Warranty Team: 1‑866‑720‑2076 or 1‑800‑621‑5622
- Water Heater Technical Support: 1‑800‑432‑8373
- Email: Use Rheem’s website contact options for order status or help placing an order.
VIII. Conclusion: Your Trusted Partner for Home Comfort
- Know Your Unit: Keep model/serial numbers handy; protect the rating plate.
- Prioritize Genuine Parts: GFAP helps ensure performance, efficiency, and warranty protection.
- Embrace Proactive Maintenance: DIY basics plus professional service extend life, improve efficiency, and keep your home safe.
- Understand Your Warranty: Most parts coverage excludes labor/shipping—plan accordingly.
For homeowners in Steubenville, Ohio, and the surrounding area, Honest Fix Home Services stands as a dedicated Rheem Pro Partner, offering expert repair and replacement services. We ensure your systems are restored with genuine Rheem parts, providing lasting comfort and peace of mind. While this guide serves as a national resource, our local team is ready to assist with your specific HVAC and plumbing needs.