0% for 25 months on a qualifying new Rheem® heating or cooling system. Installed by November 15.
The evaporator coil is where your air conditioning actually happens: warm air passes over it, gives up its heat, and the moisture in that air drips off into the drain. It sits right on top of the furnace, and pairing the two is where the care shows. A coil forced onto a furnace it does not fit pinches the airflow every room in your house depends on, or takes a screw straight through the drain pan. Honest Fix installs every coil to a written standard. This page is that standard, published in full, so you can hold any contractor to it. Ours included.
Published from our Installation Handbook · Reviewed by Alex Largent · 100% satisfaction, no exceptions
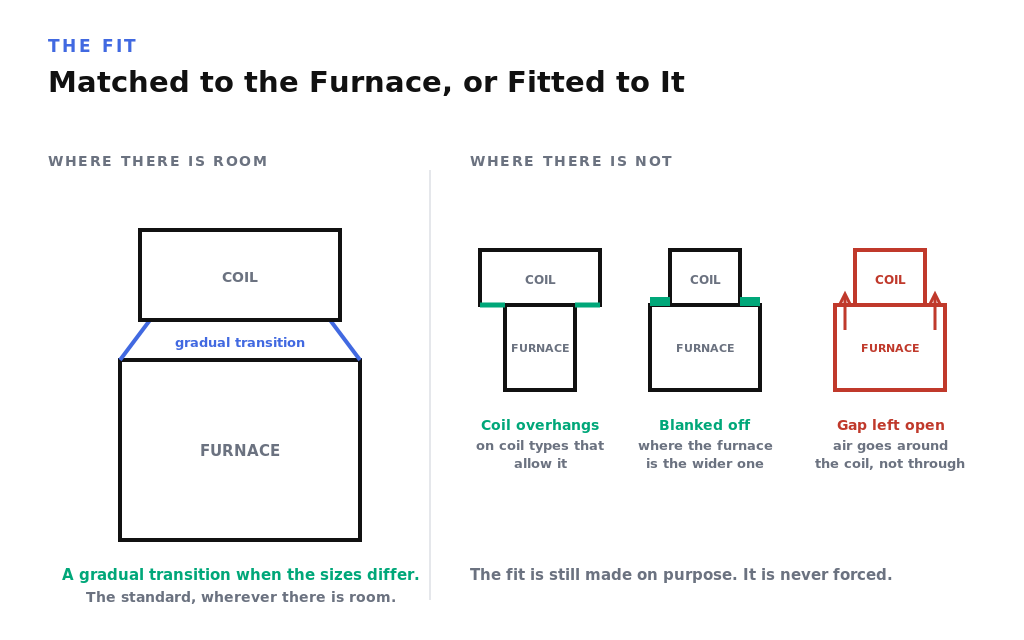
When the coil and the furnace are different sizes, a gradual transition is built between them so the airflow is not pinched where the two meet. Where there is no room for one, the coil is set to overhang on coil types that allow it, or a wider furnace is blanked off, and Honest Fix avoids that whenever it can.
Fasteners into the coil cabinet are placed with care, because a screw driven into the drain pan or the coil itself is a slow leak that shows up seasons later.
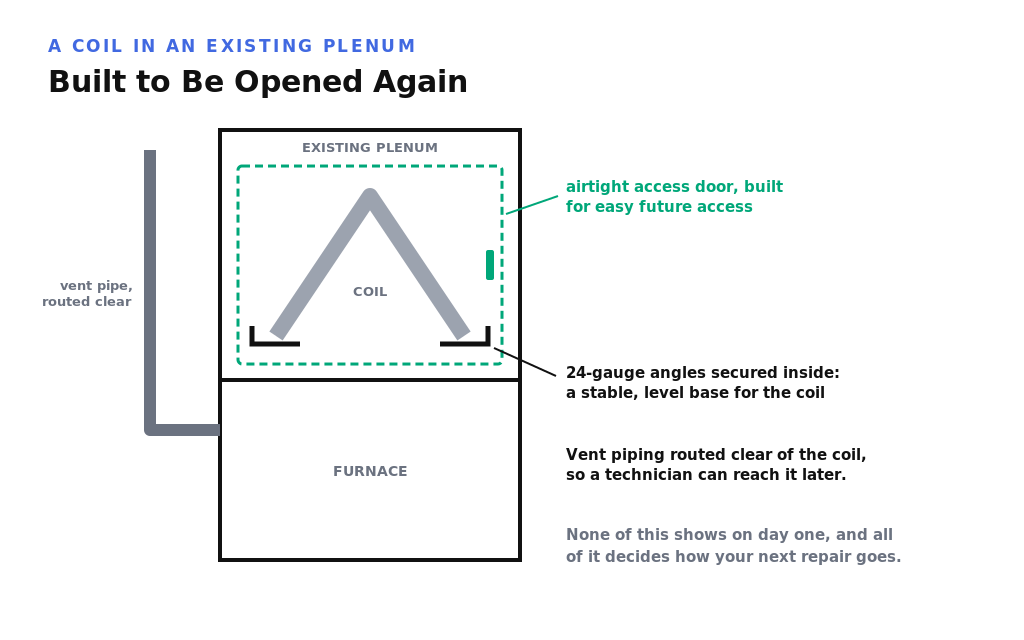
A coil set into an existing plenum gets an airtight, serviceable access door, so the coil can be reached later without cutting the ductwork apart.
A coil is a simple-looking part with an unforgiving job: it has to sit level, seal to the equipment, drain cleanly, and pair with a furnace it may not have been designed around. Most of what goes wrong with a coil traces back to how it was fit to the system it sits on. Here is what Honest Fix requires on every one. You are welcome to check yours against it.
A coil and the furnace under it are usually the same width. When they are not, a gradual transition is built between them so the air is not choked at the one point every room in the house depends on. That is the standard wherever there is room to build it. Where the room is not there, which Honest Fix avoids whenever it can, the fit is still made on purpose rather than forced. Where the equipment manufacturer requires a coil spacer between the two and the basement has no height for one, Honest Fix says so and does not install that pairing. Otherwise, on coil types that allow it, and most A coils do, the coil is set to overhang the cabinet below it, and where the furnace is the wider of the two, the difference is blanked off so air cannot slip past the coil instead of going through it. What you should never find is a coil dropped onto a cabinet it does not fit with the gap left open for the ductwork to sort out.
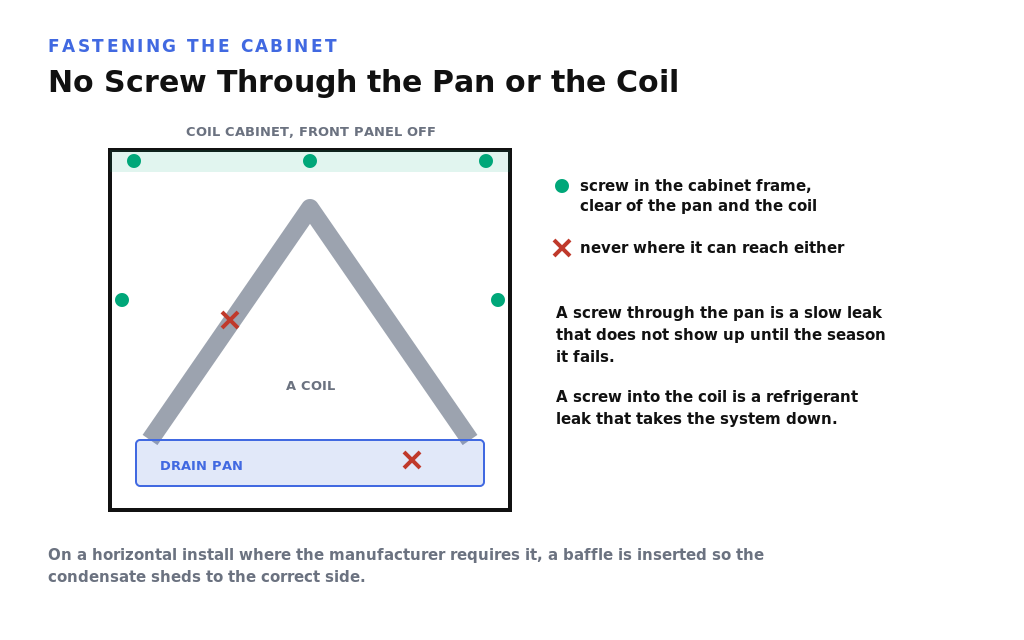
When the coil cabinet is fastened, every screw is placed so it cannot reach the drain pan or the coil. A screw through the pan is a slow leak that does not show up until the season it fails, and a screw into the coil is a refrigerant leak that takes the system down. On a horizontal install where the manufacturer requires it, a baffle is inserted so the condensate sheds to the correct side.
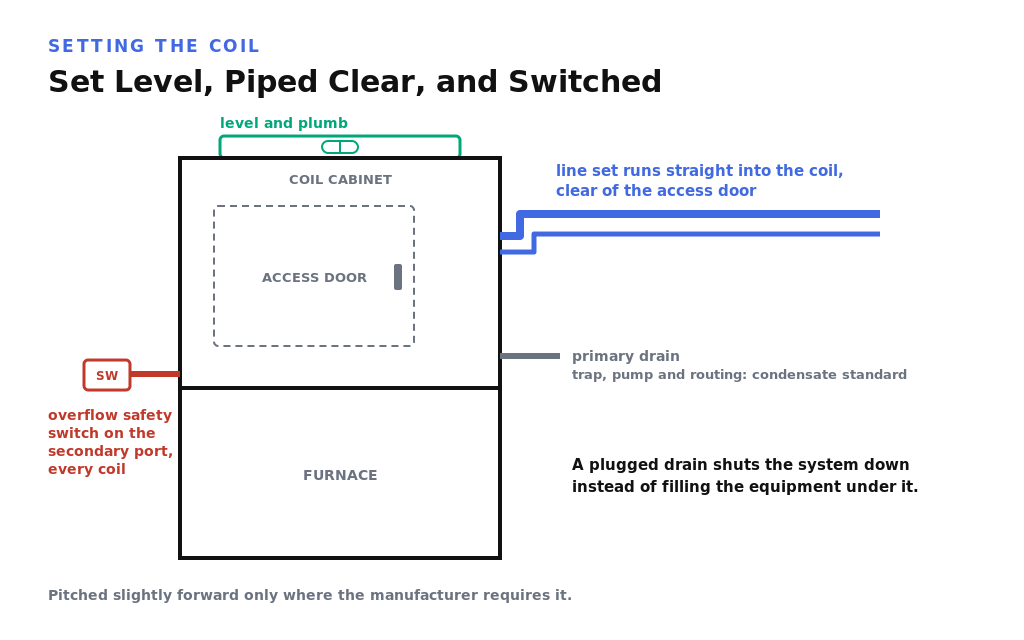
The coil is set level and plumb, or pitched slightly forward only where the manufacturer requires it, with the line set run straight into the coil without blocking the access door. The secondary drain port carries an overflow safety switch, on every coil, so a plugged drain shuts the system down instead of filling the equipment underneath it. From there the drain, the trap and the pump all follow the full condensate standard, which this page does not repeat.
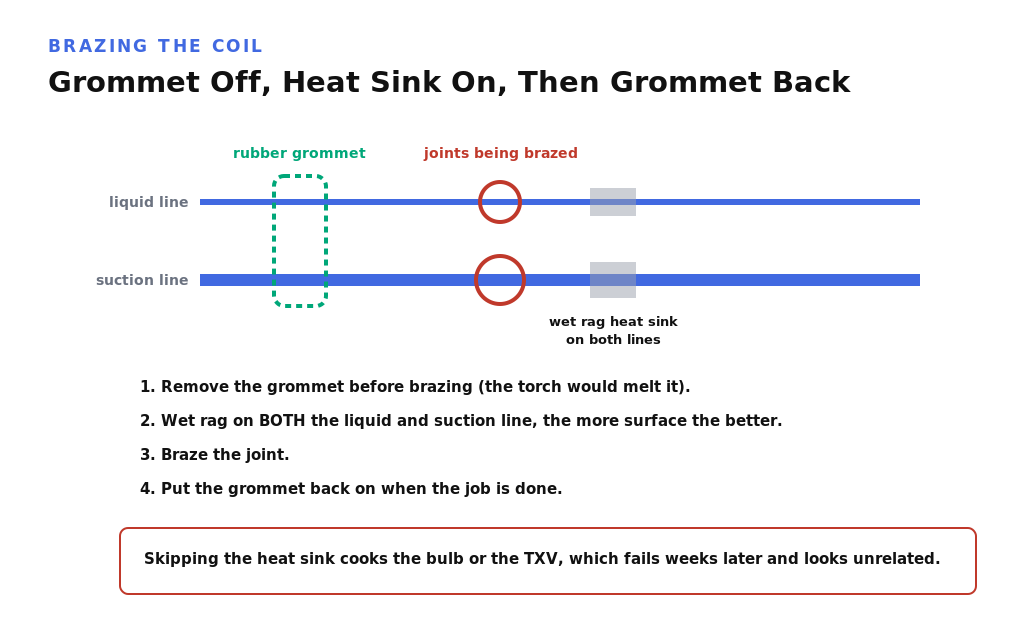
When the coil is brazed, wet rags go on both the liquid and the suction line as a heat sink, with a heat-blocking product added where a joint needs more protection, because the bulb and the TXV sit close to the joint and the heat that makes a good braze is the same heat that ruins them. The more surface area of wet rag, the better the sink. The rubber grommet around the line is removed before brazing and put back on completion, because the torch would otherwise melt it. Beyond the brazing, the refrigerant-side standard follows the outdoor unit standard for nitrogen, pressure testing, and evacuation.
When a coil is inserted into an existing plenum, an airtight door is built for easy future access, and 24-gauge angles are secured inside to give the coil a stable, level base to sit on. The vent piping is routed clear of the coil so a technician can reach it for service later. None of this shows on day one, and all of it decides how your next repair goes.
Plenty of homes here add or replace air conditioning on a furnace that is already in place, so now and then a coil and a furnace that were never designed as a set end up paired. That is exactly the situation the coil standard exists to handle.
A coil forced onto a furnace of a different size, with no transition, pinches the air the whole system depends on, and every room downstream feels it.
Not every furnace closet leaves room to build a transition. The answer is a coil set to overhang, or a wider cabinet blanked off, chosen on purpose. The answer is not a coil dropped on with the gap left open.
A fastener driven into the drain pan makes a slow leak that hides behind the cabinet and shows up as water damage long after the install.
A coil dropped into a plenum with no serviceable door means your next repair starts by cutting the ductwork open.
Field conditions. Final installation details may vary based on manufacturer requirements, local code, home conditions, equipment model, safety constraints, and the written scope of work. Where the manufacturer's instructions and this standard disagree, the manufacturer's instructions win, and your technician follows them.
It is where your home's heat leaves the air. Warm indoor air passes over the cold coil, gives up its heat to the refrigerant inside it, and the moisture in that air condenses on the coil and drips into the drain. The coil sits on top of the furnace, or inside an air handler, and it is the indoor half of the cooling cycle.
Yes, in most homes it can, and how the two are fitted together is what decides whether it was done well. If the coil and the furnace are different sizes, a gradual transition is built between them so the airflow is not pinched where they meet. Where there is no room for a transition, the coil is set to overhang on coil types that allow it, or a wider furnace is blanked off, and Honest Fix avoids that whenever it can. A coil that just gets dropped on a mismatched furnace is an avoidable problem.
Because there is a drain pan and a refrigerant coil inside it, and both are easy to hit. A screw driven into the pan makes a slow leak that does not show up for months; a screw into the coil leaks refrigerant and takes the system down. Honest Fix places every fastener with that in mind, which is the kind of thing you only notice when it was done wrong.
Because they are two separate cabinets, and once in a while they are two different widths. Where there is room, a gradual transition is built between them so the air is not pinched at the joint. Where there is not, the fit is still made on purpose: on coil types that allow it the coil is set to overhang the furnace below it, and where the furnace is the wider of the two, the difference is blanked off so air cannot slip past the coil instead of going through it. What you should not see is a coil sitting on a cabinet it does not match with the gap simply left open.
It sits in the secondary drain port and shuts the system down if the drain backs up, before the water can overflow into the furnace below it. On a coil sitting directly on a furnace, a plugged drain with no switch sends water straight into the equipment, so the switch protects both the ceiling and the furnace.
The coil and its metering device are heat-sensitive, and they sit right at the joints being brazed. Wet rags on both the liquid and suction lines act as a heat sink, with a heat-blocking product added where a joint needs more protection, so the heat is pulled away from the bulb and the TXV while the joint still gets hot enough to braze correctly. The rubber grommet around the line is taken off first so the torch does not melt it, then put back when the job is done.
More of it is visible than you would think. Look at the seam where the coil meets the furnace: it should be a built transition or a deliberate fit, not a gap somebody left. Look for the safety switch in the secondary drain port, and, if your coil went into an existing plenum, for a door you could actually open. The brazing and the fasteners inside the cabinet are the parts nobody can inspect afterward, which is why they are written down here instead. If you would rather have someone look with you, that is what a free exact quote visit is for.
Now you know what a correct evaporator coil installation looks like. If yours does not look like this, or you would rather have someone else check, Honest Fix will come out and give you a straight answer. No upsells, no games.
Air handlers · High-efficiency furnace · Condensate standards · How your system is commissioned · AC installation · The full Installation Standard